Wednesday, August 31, 2011

Setting Up a Book Template Part 9

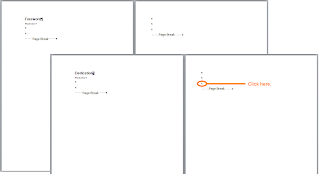
Open the document we've been working with (Genealogy Book) and confirm that the hidden codes are showing. Scroll to page 21.

Adding Appendix A: Scanned Census  Records (Pages 21, 22, 23, and 24)

  1. Click in the first empty line on page 21.
  2. Type Appendix A: Scanned census Records, and apply the Heading 1 style to the text.
  3. Double-click above Appendix A: Scanned Census  Records to open the page header (page 21).
  4. Check the header bubbles. They should say something similar to
    First Page Header -Section 5- and Same as Previous.
  5. Double-click below Appendix A: Scanned Census  Records to close the page header (page 21).
  6. If you haven't already done so, press Enter to add empty lines for four pages. Adding four pages displays the running headers and footers so that you can see them and make changes as necessary.
Changing Headers and Footers for the
Appendix A: Scanned Census  Records


Header Page 21
Scroll back to page 21 and look at the header area. Since this page is an odd page and the beginning of a new section, the header should be empty.

If the header isn't empty, scroll to the bottom of page 20, click in the last empty line on the page, and enter a Next Page section break. See the end of the previous post: Starting a New Section (Page 21) if you need details.

Footer Page 21
Scroll to the bottom of page 21 and look at the footer. It should says 9 for page 9. Congratulations! You now have working page numbers. If by chance, you page says one, you simply need to change the number. See the last post for instructions. 
    Header and Footer Page 22
    This even numbered page...page 10 for appendix a but page 22 of the template is as it should be. The book title is in the header and the page number (10) is in the footer.

    Header and Footer Page 23
    This odd numbered page...page 11 for appendix a but page 23 of the template needs some work. The header says Chapter 1: The First Generation but you want it to say Appendix A: Scanned Census  Records.
    1. Click in the header area.
    2. Remove Same as Previous from the header.
      In Word 2003, on the View menu, click Header and Footer, and then click Link to Previous.
      In Word 2007 or 2010, notice that you've had a new tab turn up with the title Header & Footer Tools Design. Click the tab, locate the Navigation Group, and click the highlighted Link to Previous.
    3. Select the text Chapter 1: The First Generation and replace it with the text Appendix A: Scanned Census Records.
    4. Scroll to the footer. It says page 11, which is what you want it to say.
    Header and Footer Page 24
    This even numbered page...page 12 for appendix a but page 24 of the template is as it should be. The book title is in the header and the page number (8) is in the footer.

    Starting a New Section (Page 25)
    1. Double-click in the body of page 20. The headers and footers close.
    2. From the top of page 24 (12), click in the fourth or fifth empty line.
    3. Add a Next Page section break.
      --In Word 2003, click Insert on the menu bar, and then select Break. The Break dialog appears. Under Sections break types, select Next Page.
      --
      In Word 2007/2010, click Page Layout, and in the Page Setup Group, select Breaks. The Break dialog appears. Under Sections Breaks, select Next Page.
    Your header disappears because this page is the beginning of a new section (Index).

    So, have you seen the pattern yet? Starting a new section in a template always involves the same process. 
    1. Enter a section break. 
    2. Put in four pages of empty lines so that you can see what's in the headers and footers. 
    3. Update the header on the third page...an odd page. 
    Hint: Starting a new chapter in an executed template follows the same process...we'll talk about during the execution post.

    All we have left to do for the template is the Index section and the back cover of the book. Then we'll talk about save options.

    Monday, August 29, 2011

    Setting Up a Book Template Part 8


    Open the document we've been working with (Genealogy Book) and confirm that the hidden codes are showing. Scroll to page 17. 


    Adding Chapter 1: The First Generation (Pages 17, 18, 19, and 20) 

    1. Click in the first empty line on page 17.
    2. Type Chapter 1: The First Generation, and apply the Heading 1 style to the text.
    3. Double-click above Chapter 1: The First Generation to open the page header (page 17).
    4. Check the header bubbles. They should say something similar to
      First Page Header -Section 4- and Same as Previous.
    5. Double-click below Chapter 1: The First Generation to close the page header (page 17).
    6. If you haven't already done so, press Enter to add empty lines for four pages. Adding four pages displays the running headers and footers so that you can see them and make changes as necessary. 

    Changing Headers and Footers for the
    Chapter 1: The First Generation Section


    Header Page 17
    Scroll back to page 17 and look at the header area. Since this page is an odd page and the beginning of a new section, the header should be empty.

    If the header isn't empty, scroll to the bottom of page 16, click in the last empty line on the page, and enter a Next Page section break. See the end of the previous post: Starting a New Section (Page 17) if you need details.

    Footer Page 17
    Scroll to the bottom of page 17 and look at the footer. It probably says 1. For this section, you are going to want to change the number to 5; that is, you want the number to continue.
    1. Double-click near the 1 to open the footer.
    2. Notice the bubble Same as Previous. Remove Same as Previous from the footer.
      In Word 2003, on the View menu, click Header and Footer, and then click Link to Previous.
      In Word 2007 or 2010, notice that you've had a new tab turn up with the title Header & Footer Tools Design. Click the tab, locate the Navigation Group, and click the highlighted Link to Previous.
    3. Select the 1 with your cursor if necessary. (My system auto selects the 1.)
    4. Right-click the 1. A pop-up menu appears.
    5. Select Format Page Number. The Page Number Format dialog appears.
    6. Locate the Page number options, and select Continue from previous section
    7. Click OK. The page number changes to 5. If you scroll through pages 18, 19, and 20, note that the page numbering has changed (6, 7, 8)  for these pages also.
      Header and Footer Page 18
      This even numbered page...page 6 for chapter 1 but page 18 of the template is as it should be. The book title is in the header and the page number (6) is in the footer.

      Header and Footer Page 19
      This odd numbered page...page 7 for chapter 1 but page 19 of the template needs some work. The header says Introduction but you want it to say Chapter 1: The First Generation.
      1. Click in the header area.
      2. Remove Same as Previous from the header.
        In Word 2003, on the View menu, click Header and Footer, and then click Link to Previous.
        In Word 2007 or 2010, notice that you've had a new tab turn up with the title Header & Footer Tools Design. Click the tab, locate the Navigation Group, and click the highlighted Link to Previous.
      3. Select the text Introduction and replace it with the text Chapter 1: The First Generation.
      4. Scroll to the footer. It says page 7, which is what you want it to say.
      Header and Footer Page 20
      This even numbered page...page 8 for chapter 1 but page 20 of the template is as it should be. The book title is in the header and the page number (8) is in the footer. 

      Starting a New Section (Page 21)
      1. Double-click in the body of page 20. The headers and footers close.
      2. From the top of page 20 (8), click in the fourth or fifth empty line.
      3. Add a Next Page section break.
        --In Word 2003, click Insert on the menu bar, and then select Break. The Break dialog appears. Under Sections break types, select Next Page.
        --
        In Word 2007/2010, click Page Layout, and in the Page Setup Group, select Breaks. The Break dialog appears. Under Sections Breaks, select Next Page.
      Your header disappears because this page is the beginning of a new section (Appendix A: Scanned Census Records). I can hear the question now: But what about the other chapters? I'm going to explain how you get them when we talk about executing a template. However, we have to have a working template before we can execute a template.

      As it is at the moment, you have the page numbering working. Getting page numbering that is working correctly is a big item. So the next post will be about appendices. 

      Friday, August 26, 2011

      Setting Up a Book Template Part 7

      Open the document we've been working on (Genealogy Book) and confirm that the hidden codes are showing. Scroll to page 13.


      Adding Introduction Section (Pages 13, 14, 15, and 16)
      1. Click in the first empty line on page 13. 
      2. Type Introduction, and apply the Heading 1 style to the text.
        Note: Don't like the way the default Heading 1 looks? Make a global change to the style. 
      3. Double-click above the word Introduction to open the page header (page 13). 
      4. Check the header bubbles. They should say something similar to
        First Page Header -Section 3- and Same as Previous
      5. Double-click below the word Introduction to close the page header (page 13).
      6. If you haven't already done so, press Enter to add empty lines for four pages. Adding four pages displays the running headers and footers so that you can see them and make changes as necessary.
      Changing Headers and Footers for the Introduction Section 

      Header Page 13
      Scroll back to page 13 and look at the header area. Since this page is an odd page and the beginning of a new section, the header should be empty. 

      If the header isn't empty, scroll to the bottom of page 12, click in the last empty line on the page, and enter a Next Page section break. See the end of the previous post: Starting a New Section (Page 13) if you need details. 

      Footer Page 13
      Scroll to the bottom of page 13 and look at the footer. It says i (Roman numeral). For this section, you are going to want to change the numbering format to Arabic numerals (1, 2, 3).
      1. Double-click near the i to open the footer. 
      2. Notice the bubble Same as Previous. Remove Same as Previous from the footer. 
        In Word 2003, on the View menu, click Header and Footer, and then click Link to Previous.
        In Word 2007 or 2010, notice that you've had a new tab turn up with the title Header & Footer Tools Design. Click the tab, locate the Navigation Group, and click the highlighted Link to Previous.
      3. Select the i with your cursor if necessary. (My system auto selects the i.)
      4. Right-click the i. A pop-up menu appears.
      5. Select Format Page Number. The Page Number Format dialog appears. 
      6. In Number format, select Arabic numerals. 
      7. Click OK. If you scroll through pages 14, 15, and 16, you note that the page format has changed for these pages also. 
        Header and Footer Page 14
        This even numbered page...page 2 of your introduction but page 14 of the template is as it should be. The book title is in the header and the page number (2) is in the footer. 

        Header and Footer Page 15
        This odd numbered page...page 3 of your introduction but page 15 of the template needs some work. The header says Table of Contents but you want it to say Introduction.
        1. Click in the header area. 
        2. Remove Same as Previous from the header. 
          In Word 2003, on the View menu, click Header and Footer, and then click Link to Previous.
          In Word 2007 or 2010, notice that you've had a new tab turn up with the title Header & Footer Tools Design. Click the tab, locate the Navigation Group, and click the highlighted Link to Previous.
        3. Select the text Table of Contents and replace it with the text Introduction
        4. Scroll to the footer. It says page 3, which is what you want it to say. 
        Header and Footer Page 16
        This even numbered page...page 4 of your introduction but page 16 of the template is as it should be. The book title is in the header and the page number (4) is in the footer.  From this point forward, you should have no reason to alter even numbered pages. 

        Starting a New Section (Page 17)
        1. Double-click in the body of page 16. The headers and footers close.
        2. From the top of page 16 (4), click in the fourth or fifth empty line.
        3. Add a Next Page section break.
          --In Word 2003, click Insert on the menu bar, and then select Break. The Break dialog appears. Under Sections break types, select Next Page.
          --
          In Word 2007/2010, click Page Layout, and in the Page Setup Group, select Breaks. The Break dialog appears. Under Sections Breaks, select Next Page.
        Your header disappears because this is the beginning of a new section (Chapter 1: The First Generation). Chapter 1 is also four pages with headers and footers; however, the section title changes from Introduction to Chapter 1: The First Generation and the page numbers continue so that the first page of this section is page 5. The page number is probably 1 at the moment. I'll tell you how to change it to 5 in the next post. 

        Wednesday, August 24, 2011

        Setting Up a Book Template Part 6

        Open the document we've been working on (Genealogy Book) and confirm that the hidden codes are showing. Scroll to page 9.

        Changing Headers and Footers on TOC (Pages 9, 10, 11, and 12)
        I've talked about headers and footers before. They lurk in the background unseen until you call them up, and then they usually cause trouble!
        • If you double-click above the words Table of Contents, the headers and footers appear.
        • If you double-click below the words Table of Contents (the body), the headers and footers disappear. 
        When you have the headers and footers displayed, notice the bubbles that appear too. They provide info on the headers and footer; for example, First Page Header Section 2 and Same as Previous. Each section of your document should have its own section number. I'm going to say that again and again. It's a piece of information that can save your sanity. For the pages making up the TOC (section 2), we going to turn off the Same as Previous because this section is a new section and it isn't the same as the previous section(s) and we want to type information in the headers and footers. If you do that with Same as Previous turned on, Word adds what you type to all previous pages, and you don't want that to happen.

        TOC Pages Header and Footer Layout

        The page on which you type Table of Contents shouldn't have a header and it doesn't so all is right with the template. However, the page should have a footer. The next three pages should have headers and footers.

        For these instructions, we going to put:
        • the title of the book in the header on an even numbered page and flush to the left margin
        • the title of the section (chapter name later on) in the header on an odd numbered page and flush to the right margin
        • the page numbers should appear in the footers on the outside edges of the pages where they are easy for your reader to see them

        Adding Footer (Page 9)
        1. Display the headers and footers.
          Shortcut: Double-click above the words Table of Contents.  
        2. Look at the header above the words Table of Contents. The First Page Header (Section 2) is set to Same as Previous, which is what you want. 
        3. Scroll down to the footer. It says First Page Footer Section 2 and is set to Same as Previous. You want to break it so that it is no longer Same As Previous.
        Remove Same As Previous from Footer
        Click in the footer area.
        In Word 2003, on the View menu, click Header and Footer, and then click Link to Previous.
        In Word 2007 or 2010, notice that you've had a new tab turn up with the title Header & Footer Tools Design. Click the tab, locate the Navigation Group, and click the highlighted Link to Previous.

        Insert a Page Number in the Footer
        See Numbering Pages for details. You want the page number at the bottom right of the page because the page is an odd numbered page (9). Also, you want to use Roman numerals starting with i to distinguish the TOC from the remainder of your document. A ten page TOC is not all that unusual so distinguishing it is a service to your reader. 

        For Word 2003, you will need to click in front of the number and press the Tab key to move the page number so that it is flush right. 

        Format the Page Number
        After you have the number in place, highlight it and format the page number.
        In Word 2003, click Insert, and then select Format Page Numbers.
        In Word 2007 or 2010, click the Insert tab and locate the Header & Footer group. Click Page Number drop-down arrow. A menu appears. Click Format Page Numbers

        1. In Number format, select Roman numerals from the drop-down list.
        2. In Page number, click Start at, accept the default of i, and then click OK
        3. Delete the extra empty return in the footer. Click in front of the empty return and click the Back Space key.
        4. Check the tab stops for the Footer style...they will be off because we added a gutter for binding. 
        5. Make a global change to the footer style to get the tab stops you want. See To Tab or Not to Tab for details. In my document, I'm clearing all tab stops, and then setting one right aligned tab stop at 6.0 inches with an alignment of right. 

        Adding Header and Footer (Page 10)
          1. Scroll to the header on page 10...an even page.
          2. Remove Same As Previous from header. 
          3. Type the title of the book (McKee Family Tree).
          4. Scroll to footer area on page 10...an even page.
          5. Insert a page number (ii). Since this is an even number page, the page number is flush left. 
          6. Delete the empty return in the footer. Click in front of the empty return and click the Back Space key.
          Adding Header and Footer (Page 11)
            1. Scroll to the header on page 11...an odd page.
            2. Remove Same As Previous from header. 
            3. Type the title of the section (Table of Contents).
            4. Make a global change to the header style to get the tab stops you want. See To Tab or Not to Tab for details. In my document, I'm clearing all tab stops, and then setting one right aligned tab stop at 6.0 inches with an alignment of right.
            5. Click before Table of Contents and press the Tab key once to move the text flush right. 
            6. Scroll to footer area on page 11...an odd page.
            7. Remove Same As Previous from header. 
            8. Insert a page number (iii). Since this is an even number page, the page number is flush left. 
            9. Delete the empty return in the footer. Click in front of the empty return and click the Back Space key.
            Adding Header and Footer (Page 12)
            Since this page is an even numbered page, it already has the proper header and footer, which it is inheriting from page 10. If you double click in the body of the page (close the header and footer) and add a few pages of empty returns, you'll find that the headers and footers (notice the page number) inherits from even page or odd page set up as appropriate.

            Starting a New Section (Page 13)
            1. Click four or five lines down from the top of page 12 (iv).
            2. Add a Next Page section break.
              --In Word 2003, click Insert on the menu bar, and then select Break. The Break dialog appears. Under Sections break types, select Next Page.
              --
              In Word 2007/2010, click Page Layout, and in the Page Setup Group, select Breaks. The Break dialog appears. Under Sections Breaks, select Next Page.
            Your header disappears because this is the beginning of a new section (Introduction). The Introduction is also four pages with headers and footers; however, the section title changes from Table of Contents to Introduction and the page number changes from Roman to Arabic. So the next post will cover pages 13, 14, 15, 16...or if you're following in the footers, 1, 2, 3, 4. I'll probably post on Friday to give you some time to digest all of these instructions. In the meantime, post a comment or email me (info@technology-tamers.com) if you have questions.

            Tuesday, August 23, 2011

            Distruption

            Sorry to have stopped posting with no explanation. I had to break off to go to a funeral in New Orleans. The sad event was the death of my cousin's child, Brandy Elizabeth DuQuesne. She was a lovely young woman in all aspects and she will be missed by so many for so very long.


            The disconcerting/funny event was that I had an ex-fiancee (initials LSA) from 35 years ago come to the funeral home with extended family. After all these years, LSA offered an explanation of why he was such an ass to me and lots of other people all those years ago. It was delivered with the overtones of an apology and the piece of information that he is a different person now. After pondering this occurrence for a few days, I've decided he hasn't changed one damn bit and I made the right choice to dump him all those years ago. Who would approach someone (at a funeral yet) with this drivel from 35 years ago except a self-centered ass? LSA took no note of how I might react, how my current beau (initials GWN) might react, or how my grieving family might react to this disruption. I certainly hope LSA's guilt was assuaged with this little performance. The upshot of whole episode is that I'm bemused (and more than a little amused) and my beloved beau GWN now has years of material with which to tease me. 


            I also spent some extra time with my 80 year old mother, which I've needed to do for a long time. And, I caught up with a friend or two while in New Orleans. 


            All of this has made for a very busy several days. However, things are settling back down now and I'll get back to posting part 6 (and parts beyond) tomorrow p.m.   

            Tuesday, August 16, 2011

            Setting Up a Book Template Part 5

            We're ready to add pages for the Table of Contents, which is the first section that needs both headers and footers. If you look back at part Layout Tab in Part 1, you'll note:

            • All new sections start when you select the section break  New page.
              Entering a section break isolates subsequent pages so that you can make changes without affecting previous pages. The changes you are going to make are to headers and footers.
            • All first pages are different from other pages in the section (Different first page).
              In your design, you want to suppress the header on the first page of the section. 
            • Odd and even pages are different (Different odd and even)
              In your design, you want page numbers and text elements on the outside edges of mirrored pages. 
            Adding a Section Break
            1. Open the document we've been working on: Genealogy Book.
            2. In the last post, the last thing I had you do was enter a page break (Ctrl + Enter).
            3. Click to place your cursor before the Page Break.
            4. Delete the Page Break.
            5. Add a Next Page section break.
              --In Word 2003, click Insert on the menu bar, and then select Break. The Break dialog appears. Under Sections break types, select Next Page.
              --
              In Word 2007/2010, click Page Layout, and in the Page Setup Group, select Breaks. The Break dialog appears. Under Sections Breaks, select Next Page.

              Your cursor moves to the top of the next page (page 7).
            Table of Contents (TOC) Pages (Pages 9, 10, 11 and 12)

            1.  If you only have one or two empty lines, hold down the Enter key. You want to add three and half pages of empty lines. You need a total of four pages so that you can set up all of the headers and footers for the section. When you insert an electronic TOC, you'll have these empty returns left over at the end of the TOC; however, you can simply delete them at the time. When you're ready to delete, remember that you need an even number of pages (a front...odd page and a back...even page a.k.a. the slipsheet).
            2. Click at the first empty line of your new section (top of page 9), type Table of Contents, and apply the HeadingFake style. 
            3. Make a local change to HeadingFake. Right-click anywhere in Table of Contents, and then select Paragraph from the pop-up menu. Change the spacing before the paragraph to 12 points. 
            The next task is going to be setting up Headers and Footers. You're about to find out exactly why people like me get paid lots of money for doing what we do. See you on the next post. 

            Friday, August 12, 2011

            Setting Up a Book Template Part 4

            We're going to continue creating a book template. The next task is to create foreword page and a dedication page. These pages are optional and you can skip this step.


            A foreword is a piece of text that is written by someone other than the primary author of the book. In my case, I would have a cousin who sent me a box of information that was the start of my family history write a foreword for one my books. She could talk about how my aunt carried the box with her when she left her home of DuQuoin, IL, moving to St. Louis. Later, my aunt--box in hand--moved to Chicago. From Chicago, my aunt moved to Orange County, CA, where she died. My cousin rescued the box and brought it home with her to North Carolina. She had no plans for the box of treasures, and then I wrote to her. She mailed the box to me when I was living in Nashville, TN, and I brought the box with its treasured contents with me to Florida. 


            A dedication page is used to thank people--sometimes organizations--that were particularly helpful in the writing of your book. I have a list of distant relatives to put on my pages and more than one genealogy society--all of whom provided help at pivotal points in my research.


            To complete these instructions, you are going to need a Heading style that isn't numbered. The reason you need this style is because numbered styles appear in a generated table of content. For the Foreword and Dedication pages, you need a Heading style that isn't picked up when you generate a table of contents. That style needs to look like a Heading 1 style but without the number in the style name.


            Heading Fake
            1. Open the document we've been working on: Genealogy Book.
            2. Click to place your cursor is the first empty line on the five page. 
            3. Display the Styles (or Styles and Formatting) pane. See A Style for Every Season for instruction on how to display the pane. 
            4. Add the HeadingFake style. Notice I typed the name as one word. 
            5. Locate and select the New Style button. The new style dialog appears.

              --In Word 2003, the New Style button is at the top of the list.
              --In Word 2007 and 2010, the New Style button is circled in the illustration below.
              Click graphic to open in a new window.
            6. In the Properties group:
              --In Name, type HeaderFake.
              --In Style type, confirm that the type is Paragraph.
              --In Style based on, select (no style).
              --In Style for following paragraph, select Body Text
            7. In the Formatting group, select a font, size, attributes (B, I, U), and a color. The selections you make should match what you think you want for a Heading 1. If you make a mistake, it's not a problem. All you have to do is modify the style HeaderFake and the changes you make will cascade...that is, the changes will apply to all places where HeaderFake is applied. (I like Arial, 16 pt, Bold, Automatic.)
            8. Click the Format button, and then select Paragraph
            9. On the Indents and Spacing tab, adjust the Spacing Before/After to 12 pt before and 3 pt after, and confirm that the line spacing is Single
            10. On the Line and Page Breaks tab, in the Pagination group, select Keep with next and Page break before
            11. Click OK to save your Paragraph changes, and then click OK to save the new style. 


            Foreword Page (Page 5 and 6...the slip sheet)
            1. Type the word Foreword.
            2. Apply the style HeaderFake, and then press the Enter key. The style type should be Body Text.
            3. Type the word Placeholder. You don't have the text yet. When you get it, you can replace the word Placeholder with your text. You are going to want to use the paste special option Unformatted Text so that the text you paste has the Body Text style applied to it automatically. 
            4. Press the Enter key a few times to add a few empty lines.
            5. Insert a page break (Ctrl + Enter). 
            6. Add a slip sheet (the blank page you need for the backside of the Foreword page).
              --Press the Enter key a few times to add a few empty lines.
              --Insert a page break (Ctrl Enter). 

            Dedication Page (Page 7 and 8...the slip sheet)

            1. Type the word Dedication.
            2. Apply the style HeaderFake, and then press the Enter key. The style type should be Body Text.
            3. Type the word Placeholder. You don't have the text yet. When you get it, you can replace the word Placeholder with your text. You are going to want to use the paste special option Unformatted Text so that the text you paste has the Body Text style applied to it automatically. 
            4. Press the Enter key a few times to add a few empty lines.
            5. Insert a page break (Ctrl Enter). 
            6. Add a slip sheet (the blank page you need for the backside of the Foreword page).
              --Press the Enter key a few times to add a few empty lines.
              --Insert a page break (Ctrl Enter). 


            The next post addresses adding pages for the table of contents...and dealing with headers and footers for the first time. Exciting stuff! 

              Tuesday, August 9, 2011

              Setting Up a Book Template Part 3

              We're going to continue creating a book template. The next task is to create a title page and a publication page.

              A title page can echo your cover; for example, include all of the same elements plus a subtitle and a publication statement. Or, the title page can be completely different. For these instructions, we are going to assume you want a different page (no picture).

              The publication page includes copyright information, a statement that tells your readers how they can use the text in your book, and contact information for you in case someone wants to order your book.

              Title Page (Page 3)

              1. Open the document we've been working on: Genealogy Book.
              2. Remember you have a cover page (outside and inside)...two pages in your Word document.
              3. Click to place your cursor is the first empty line on the third page.
              4. Type a title in the first empty line, and then apply the built in Title or Book Title style.
                --Display a list of all styles and look for the Title or Book Title style.
                --When you locate the Title or Book Title style, click it.
              5. Make a local change to put space in front of the title.
                --Right-click anywhere in title text, and a pop-up menu appears.
                --Select Paragraph and the Paragraph dialog appears.
                --On the Indents and Spacing tab, enter 260 (or there abouts) in the Before field in Spacing.
              6. Click in the next empty line, and add a subtitle. Type the text and apply the subtitle style. This step is optional.
              7. Click in the next empty line, and add the author's name. Type the name and apply the author style.
              8. Click in the next empty line, and add publication information or a location. Type the text and apply the subtitle style. This step is optional.
              9. Click in the next empty line, and insert a page break (Ctrl + Enter). The few empty lines you have appear at the top of page four (a.k.a. the publication page). You might want to add several more blank lines. You can just keep clicking in the next empty line for the next element until we get to the end of the template...you just need to keep pressing Enter to add the lines as needed. 
              10. Add a publication page.

              Publication Page (Page 4)

              1. Type the publication page text. See the sample below for what I put on my page. You might also want to study publication pages in printed books to see what they put on their publication pages. You can apply the Normal style to the text or you can add a style...for example, PubPage
              2. Click in the next empty line, and insert a page break (Ctrl + Enter). The few empty lines you have appear at the top of page five (a.k.a. the foreword page). 

              Click the graphic to open in another window.

              The next post will be about the optional Foreword page.

              Friday, August 5, 2011

              Setting up a Book Template Part 2

              In these instructions, I'm going to take you through from the front cover through to the back cover. However, if you plan to use a print on demand (POD) house (for example, Print My Genealogy), you need to check their requirement. It may be that they need to have the covers separate from the pages of the book. Other PODs might want the front and back covers included as part of the PDF.

              For my job, the covers are always included in the PDF because they use a DocuTech (special machine) to print the books as needed. The DocuTech pulls card stock for the covers and paper for the pages as needed. Many professional print shops will handle your books in the same way.

              So let's create a cover.

              1. Open the document you created (Genealogy Book). Note that you create a document, and when you're happy with it, you save it as a template. We've just started working on the document.

                When we last left the document, you had turned on the hidden codes so that you could see the end of document paragraph mark. You can turn off the hidden codes or leave them on. It's a matter of preference. I turn them on and off as I need to see them or want to hide them. For this project I would suggest that you leave the paragraph marks visible.

                We're not going to go into cover design because it's a huge topic and subject to lots of opinions. I'm just going to suggest that you add a graphic, a title, and an author's name. The one piece of advice I would offer is to pick a margin and stick with it. Do flush left, flush center, or flush right...avoid mixing the alignments.
              2. Insert a graphic. The graphic should be existing in a folder on your system.

                Word 2003: Click the Insert menu--> select Picture-->select From File. A dialog appears.
                Navigate to and select the graphic you want to use. Press Enter a few times to add a few new line. Click in the first emply line below the graphic.

                Word 2007 or 2010: Click the Insert tab-->select Picture. A dialog appears.
                Navigate to and select the graphic you want to use. Press Enter a few times to add a few new line. Click in the first emply line below the graphic.

                Note the style that is applied to the graphic and the lines you added will be Normal and that's fine.
                 
              3. Type a title in the first empty line below the graphic, and then apply the built in Title or Book Title style.

                --Display a list of all styles. (See A Style for Every Season for instructions.)
                --When you locate the Title or Book Title style, click it.
                --Press the down arrow once to move your curson to the next emply line with a Normal style applied. You're going to add the author's name in the third line.

                Note: If you don't like what you see for the title, you can change it. Right-click the Title or Book Title style in the Styles (or Styles and Formatting) list, select Modify, and use the Modify Style dialog to change the characteristics of the style.
              4. Type an author's name in the first empty line below the title. 

                The style that is applied is Normal. You can leave it as is. Or, you can add a new style named Author and format it as part of your cover art. You may want to create the style because you'll want to use it on the title page also.

                See step 3 in Create a Name Character Style to see how to display the create style dialog.
                In Name, enter Author.
                In Style type, accept the default of paragraph.
                Make the selections necessary to format the Author style (font, size, etc.), and then click OK.
                Click in the author's name you typed, and apply the Author style.
              5. Click in the next emply line, and insert a page break (Ctrl + Enter). The few empty lines you have appear at the top of page two (a.k.a. the inside front cover). You might want to add several more blank lines. You can just keep clicking in the next empty line for the next element.

                Traditionally, the inside front cover is empty; that is, no text. However, when you create your own templates, you can do as you please. It's your template/book. If you can think of something appropriate--for example, a graphic of the family tree--you might want to add it.
              6. Add a title page. Click in the next empty line, and insert a page break (Ctrl + Enter). The few empty lines you have appear at the top of page three (a.k.a. the title page).
              Here's what your document should look like so far.

              Not much to see yet but it will get better...just stick with me.

              Tuesday, August 2, 2011

              Setting up a Book Template Part 1

              When you begin setting up a long template (more than a few pages is considered long), the easiest way that I've found to do it is to start at the beginning and work my way through to the end. After I have all of the sections in place, I can go back and begin to fill the template with my personal text.

              Be sure to notice that this post has Part 1 in the title. I'm not sure how many posts are going to be involved. However, once I record the steps here, you should be able to come back to the posts and repeat the steps in sequence to create as many book templates as you need.

              To start, we're going to complete the page setup.

              1. Open a new Word document...yes templates start with one empty page...the Normal template.
              2. Open the Page Setup dialog.

              Word 2003
              Select File, and then Page Setup. The Page Setup dialog appears.

              Word 2007 or 2010
              Select the Page Layout tab and locate the Page Setup group. Click the small arrow in the lower right of the group. The Page Setup dialog appears. 
              Margins Tab

              Top, Bottom, Inside, and Outside margins = one inch
              Gutter (binding edge) = one half inch
              Orientation = Portrait
              Pages = Mirror margins (See the post on Mirrored Margins)
              Apply to = Whole document 

              The advantage of having one page is that it is the whole document and the selections you make in the Page Setup dialog apply throughout your document. 

              Paper Tab
              Accept the default of 8.5 x 11 for a standard page size. Other sizes are available if you are going to a publishing on demand house like Lulu.com. However, we are going to create a template and book that you can put on a CD or Flash Drive and take to your local print shop for production.

              Layout Tab
              Section start = New Page. 
              Headers and Footers: 
              Different odd and even = Click it to add a check mark.
              Different first page = Click it to add a check mark.

              Selecting the header and foot options allow you to have one header and footer for even pages, another header and footer for odd pages, and a different page for the first page of chapter. You start a new chapter each time to enter a New Page section break. 

              Click OK to save your selection. 
              Click File, Save As and save your document under the name Genealogy Book

              Not much to see yet huh? But there's lots more to come.

              One thing I do want you to be aware of is a hidden code. Display the codes (Hidden Word Codes). All of the instructions that you just entered in the Page Setup dialog reside in the lone paragraph mark that you see. You cannot delete this paragraph mark. This paragraph mark will always be the final item in your document, affecting everything--say 300 pages of a book--that appears before it. You don't necessarily need to do anything with the paragraph mark. However, if you are to understand how Word works, you need to understand that it's there and what affect it has on your document.

              More in my next post. If you have a moment, find a piece of art (clip art from the Web is fine) to use for cover art...the page you just created is the front cover of your book.