Saturday, April 28, 2012

Much Ado About Graphic Software...Part 9

When you do newspaper research, one of the frustrations is that the information you need for a reference is at the top of the page, and the beginning of an article--for example, an obituary--might start near the end of a column and wrap to the top of the next column. Getting all of the pieces in one document isn't easy. You can always print the pieces you need and use scissors and tape to get the arrangement you want. If you use Paint, you can do the same task electronically.

Prior to doing this task, we need to discuss a computer concept...instantiation. When you own software--for example, Paint--you can open as many copies (instances) of Paint as you like and as your system can accommodate. Each time you start a new instance of Paint, Windows adds an icon in the task bar at the bottom of your screen. 
Each instance of Paint is running separately, which means that what you do in one instance of Paint has no affect in another instance of Paint. Another word for instance is session.

Instructions
Capture Reference Information
  1. Find an online article you want to copy; for example, an online newspaper article. 
  2. Display the reference information at the top of the page on your screen.
  3. Click the PRT SC (print screen) button to place a copy on your clipboard.
    Note: On a laptop, you'll probably have to press two keys--FN + PRT SC.
     
Paste Reference Information
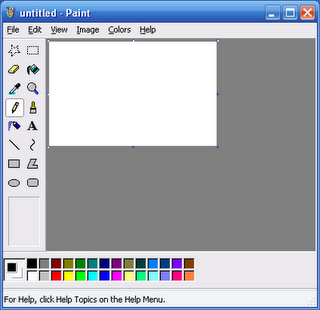
  1. Open instance one of Paint (select Start, All Programs, Accessories, and then Paint).
  2. Paste (Ctrl + P) the copy on your clipboard. 
  3. Use the Select tool to select the reference information.
  4. Copy  (Ctrl + C) the reference information to the clipboard. 
Create Master Graphic
  1. Open instance two of Paint (select StartAll ProgramsAccessories, and then Paint). 
  2. Paste (Ctrl + P) the clip of the reference information. 
  3. Resize your palette so that you have lots of empty space. You're going to add more pieces to the palette of instance two of Paint.
  4. Save instance two of Paint as a .png under a name you'll remember. 
Capture the Article Text
  1. Return to the online article. (Press Alt + Tab repeatedly to cycle through your open programs.) 
  2. Show as much of the article as possible on your screen. 
  3. Capture the article. Click the PRT SC (print screen) button to place a copy on your clipboard. 
  4. Open instance three of Paint (select StartAll ProgramsAccessories, and then Paint). 
  5. Paste (Ctrl + P) the clip of the article. 
Update the Master Graphic with Part 1 of the Article
  1. In instance three of Paint, use the Select tool to select the first portion of the article.
  2. Copy  (Ctrl + C) the first portion of the article to the clipboard.
  3. Return to instance two of Paint (the master)--Press Alt + Tab.  
  4. Paste (Ctrl + P) the clip of the article. It overlays the reference information clip and it has a dotted outline.
  5. Move the clip.
    Click the clip of the article and do not let go of your mouse button. You've just grabbed the first portion of the article. Move your cursor around and you'll find that the article clip moves with your cursor. 
  6. Move the clip of the article below the reference information clip.
  7. Save instance two of Paint (the master).
Update the Master Graphic with Additional Parts of the Article
  1. Return to instance three of Paint and use the Select tool to select the next portion of the article.
  2. Return to instance two of Paint (the master). 
  3. Paste (Ctrl + P) the clip of the article. 
  4. Move the clip. 
  5. Repeat these steps until you have the whole article arranged to your satisfaction.
  6. Save instance two of Paint (the master).
  7. Close all of the programs you have open.
Sample Clipping
Click the graphic to see a larger version, and then press the ESC key to close it.

I completed the instructions four times to get the four pieces of the article into one .png file. Can you see the four pieces? Because I'm not dealing with color, I can also save the document as a .gif or a .jpg and attach the file to a record in my genealogy software. 

The other option I have is to insert the .png into a Word document and save the file as a .pdf...a huge step toward becoming a digital genealogist. 

Perfecting this method takes a bit of practice. However, after a while it becomes second nature. Remember that Ctrl + Z (undo) usually gets you out of trouble.

Fun part...
Now here's the fun part...being able to move pieces around on a Paint palette is an undocumented feature of Paint. In addition, I've never seen instructions for piecing together the display I want from various clipped pieces. So there you have it...you're now privy to some super secret info...stuff that not a lot of people know how to do. I hope you find it useful.

Thursday, April 26, 2012

More Please...Part 2


The Find and Replace tabs are virtually the same with the exception of the Replace with field on the Replace tab.

Most people readily figure out how to find and replace a word or a phrase. In the example above, I'm going to find Duquoin and replace it with Du Quoin. This example is a straight forward replacement. However, not all finds or replaces are that straight forward.

When you find that Word is picking up additional words you did not intend, start looking at the options that can narrow what Word searches for. For example, if I search for settle, word will pick up settler and settlement because settle is nested in the additional words. If I apply the Find whole word only option, Word excludes settler and settlement from find results.

Be sure to notice that when you select options that narrow the results Word adds the options below the Find what field. In addition, when you add attributes to the Replace with fields, Word adds the selected attributes below the Replace with field. Word will always tell you what has been applied to these two fields.

To apply attributes to replacement text, use the Format and Special buttons. Below is an example.


Click the graphic to display a larger version, and then click the Esc key to close it. 

I'm going to let you study the graphic to see if you can identify the attributes I selected for the replacement text. I'll talk about each of the Format and Special buttons options in future posts. Understanding these options allows you to mark up a document for review in a different way...a way that can be quickly undone later on. So check out the graphic.

P.S. If you're a long time reader of this blog, you should recognize the Replace Font dialog...it's the same as the Font dialog you've used in the past...Word is reusing the dialog...another example of a chance to reuse knowledge you've already gained.

If you're new to this blog, see Format --> Font for a sample of a similar dialog. Word frequently reuses dialogs. After you learn to use a dialog in one place in Word, you know how use it when you encounter it in another area of Word.

Monday, April 23, 2012

More Please...Part 1


Display the Find and Replace Dialog
Word 2007/2010: Open a document, click the Find drop-down arrow on the Home tab, and then select Advanced Find. The other option is to click Find, click drop-down arrow beside the search field, and then select Advanced Find

Word 2003:  
Press Ctrl + F. This method also works in later versions of Word. 

Most users learn to use the basic Find function and perhaps the Replace function. I've said something about the Find functions before. See Word "Find Next" Workaround

Did you ever press the More button at the bottom of the Find and Replace dialog? When you click More, the button name changes to Less and the dialog opens additional options you can use to refine a search. When you click Less, the system hides the additional options. 

I'm not going to get into it much in this post. However, you might want to open Word and take a look at some of these options. We'll go through them is upcoming posts. 

Saturday, April 21, 2012

Much Ado About Graphic Software...Part 8

Resize Option
To have something to resize, you need an over sized graphic. I'm going to ask you to download the hand and pen, open it in Paint, and then resize it. We will use the resized graphic to look at the rotate options too.

Get the Graphic

  1. Click here to go to the graphic in the Microsoft clip art. 
  2. Click the Download button. A save option appears.
  3. Select Save As so that you can save the graphic under a name you'll recognize. In the case of the dialog above, I would click the drop-down arrow beside the Save button to display a pop-up with a Save As option. 
  4. Save the graphic under a name (pen_hand) and in a convenient spot on your system.
Open the Graphic in Paint 

  1. Open Paint
  2. Open the graphic (pen_hand). It should be too big for your screen. 

Resize the Drawing
  1. Select the entire drawing (Ctrl + A). You have options here.
  2. If you're comfortable using the handles (small circles along the right size and bottom edge of the drawing), point your cursor at the handle at the bottom right corner of the graphic. When your cursor turns into a double-headed arrow, click once to grab the corner. Move your mouse toward the upper left. The trick with this method--and this takes some practice--is to make sure that you keep the ratio the same. I use this method; however, you have to take into account that I've done this for a long time and sometimes I can't get one of these to resize without distorting it. 
  3. Your other option is to use the Resize and Skew dialog.
    --In Paint 2003, select Image, Resize and Skew.
    --In Paint 2007/2010, in the Image group, select Resize.
    The Resize and Skew dialog appears.
  4. Accept the default of Percentage, and in the Horizontal field enter 50, and then click OK
  5. If the graphic isn't small enough, repeat these step--enter 50% again--and Paint resizes the drawing. 

In the dialog, Pixels refer to the dots that make up the image. Unless you really get into to this, you're most likely will have no need to resize based on pixels. The skew pulls the drawing. You should try playing with the skew particularly if you have an artistic bent.

Rotate Option
  1. Select the entire drawing (Ctrl A). 
  2. Use the Rotate/Flip options.
    --In Paint 2003, select ImageRotate/Flip.
    --In Paint 2007/2010, in the Image group, select Rotate
  3. Click the Flip Horizontal option. 
You have several other options: Rotate right or left for various degrees and the vertical flip option. When you look at other software, you'll find lots of additional options for rotation. However, my needs have always been relatively simple and I've found that the options in Paint have served my needs.

Next Post

We'll build a graphic from pieces. For example, we can take an obituary that starts at the end of one newspaper column and wraps to the top of the next column. We'll build a graphic that puts the pieces together.

FBI to Turn Off Internet for Some Users

I don't normally do newsy posts; however, in this case it may be warranted. In the Tampa Tribune this a.m. is an article about a hacker ring that the FBI and similar organizations in other countries have broken up: Many in danger of losing the Internet. When I googled to get the address for this link, the entries for newspapers were all over the map. So this problem is being widely reported.

The upshot of the article is that 570,000 computers world-wide have been infected with a virus. The virus causes the presentation of an alternate version of the Internet and inexperienced users can't tell the difference...could be it's good enough that even experienced users don't notice either. Seems the FBI has set up a program that will not allow infected computers to reach the Internet after 9 July 2012. An error page (404 Page not found...a very common error) will appear and the owner of the computer won't know what's up.

The FBI has also set up a website that allows you to check your computer to confirm that it hasn't been infected. I've checked my PC and laptop. It's easy enough to do for even the inexperienced user and perhaps worth ten minutes of your time to confirm that you're not one of the poor souls who has been hacked.

Here's the link to the article again: Many in danger of losing the Internet.

Thursday, April 19, 2012

Table It!...Part 23...Layout Tab on Ribbon

Click once to display a larger version of the ribbons graphic and then press the Esc key to close it.

The Layout tab, like all tabs in Word, is divided into groups. Word grouped commands on tabs based on logical association. Sometimes it's easier and faster to click a button on a tab than to right-click in a table and display the pop-up menu. You'll learn to make the choice of one or the other on the fly. It will be a matter of which option is most easily accessed. I'll start on the left side of the Layout tab and address the option by group.

Table Group
  • Select: Click this option to display a drop-down list of select options. You can select a cell, column, row, or the entire table.
  • View Guidelines: You've seen this one before. When you remove all the boarders from a table, you can select the table and then click this option to see the shadow of the lines of the table, making working with the table easier.
  • Properties: You've probably seen this option too much! Click the Properties button as another way of displaying the table properties dialog.
Rows & Columns Group
Options in this group enable you to add and delete cells, rows, columns, and tables. If you click the small arrow in the lower right of the group, you'll find all of the insert cell options. You've seen these options on the pop-up that appears when you right-click in a cell.

Merge Group
Options in this group allow you to merge or split cells and split tables. These are all topics you've read about and know how and when to use. They too are available on the pop-up menu.

Cell Size Group
  • AutoFit: Click this button to display the following options: AutoFit Contents, AutoFit Window, Fixed Column Width. These option appear on the Insert Table dialog. If you don't remember, see Table It!...Part 2. They also appear on the pop-up menu when you right-click in a table.
  • Height/Width: Look at the cells to the right. Use the up and down arrows to affect the height of rows and the width of cells. You've done this same task moving the buttons on the ruler to resize columns. You can resize rows using the ruler on the left of the page. You read about this in Table It!...Part 3...Resizing Columns.
  • Distribute Rows/Columns: Click anywhere in table and click these button to cause the even distribution of rows and columns. When you select a table and right-click on it, these options appear on the pop-up menu.
  • Table Properties: Click the arrow in the lower right of the Cell Size group and the Table Properties dialog appears.
Alignment Group
  • Cell alignment buttons: Select one or more cells and then click a button to realign text in a cell.
  • Text Direction: Based on the reading statistics, this one seems to be a favorite. Merge a few cells, type some text, and then click this button to alter the text direction.
  • Cell Margins: Click the button to display the Table Options dialog. The big item on this dialog is the cell padding...the distance between the text and the border...add a little space so it's easy for your reader to distinguish the text from the border.
Data Group
  • Sort: Click this button to display the Sort dialog and sort rows in a table. Note that you can't sort a table that includes merged cells. If you're trying to sort a list that isn't in a table, look for this same button on the Home tab in the Paragraph group.
  • Repeat Header Rows: Select a row in a table (most likely the first row or two and then click this button to have the header repeat when the contents of the table spills onto a subsequent page...think long table.
  • Convert to Text: Select a table, and then click this button to do what the button says...convert text that is currently in a table to plain text. A convert dialog appears. You pick a divider (paragraph, tab, comma, or other). Remember that a space is a valid divider.
  • Formula: Click at your own risk...I'm not going there.
What Should You Take Away
Again, where you select an option to apply it (ribbon? pop-up?) will depend on what you have displayed and what you can get at fastest. However, if you know where the options are, you have choices, which is why Word places options in more than one place...an accommodation that you'll come to love as you begin to remember all of the places where Word tucked away these options.

That's it for tables...I think...unless you post questions...

Tuesday, April 17, 2012

Table It!...Part 22...Design Tab on Ribbon

Click once to display a larger version of the ribbons graphic, and then press the Esc key to close it. 

When you click in the cell of a table, the Table tools with tabs appears. You can use options on the Designer tab to quick format a table.

Using Pre-Formatted Options

  1. Add a table with four columns and four rows. 
  2. Add text in each cell. It doesn't matter what the text is. 
  3. In the Table Styles group, the default layout is a plain table. Click any other layout to see what happens to your table. 
  4. In the Table Styles Options group, click to add or remove a check mark beside an option; for example, click Total Row to format a total row at the bottom of your table. 
  5. Click the Shading drop-down to change colors appearing in the table.
  6. Click the Borders drop-down to change the borders that appear. 
Borders Drop-Down
  • Select a borders option from the upper portion of the drop-down list or you can select Borders and Shading at the end of the drop-down to display the dialog that you've used in the past.
  • Select View Gridlines to turn on the lines around cells. You use this option when you don't have borders applied but you need to see where the cells are (for example, merged cells). The option is a toggle: click once to turn it on and once to turn it off. 
  • Select Draw Table if you're a driven soul who wants to design a table free hand. I've never been that driven. 
Draw Borders Group
Use these options to design a table free hand. Again, I've never been that driven that I've used these option. However, you should be aware that they are there in case you can't find a pre-formatted table that you like. 

Next Post
We'll look at the Layout tab, and then for the most part we'll be finished with tables. If you have questions, please post them. 


Saturday, April 14, 2012

Much Ado About Graphic Software...Part 7

In the last graphics post, I suggested that you might already see how you can change colors in a piece of clip art. Here are the tools again.
Most pieces of clip art have solid color areas in the drawing. Photographs include shaded color. So all of what we're going to do in this post applies to clip art. The exception is correcting something small like red eye in a photograph. But I'm getting ahead of myself.

Download a Graphic

  1. Download the pen and paper graphic at the following address: http://office.microsoft.com/en-us/images/results.aspx?qu=pen&ctt=1#ai:MC900088568|mt:0|. 
  2. Click Download and a download dialog opens. You can get a different dialog depending on the version of Windows you are using. However, they are all similar with similar options. 
  3. Click Save. A pop up appears. Select Save As to display a Save As dialog. Or, a Save As dialog appears automatically.
  4. Navigate to a location on your system where you'll be able to find the graphic. I keep a folder in my Pictures folder labeled Delete. I place all miscellaneous downloads like this one in that folder. When the folder gets full...and my system starts slowing down...I delete everything in the Delete folder. 
  5. Give the graphic a name you'll recognize; for example, Pen.png.
  6. Save the graphic.

    Note: We're downloading because if you copy the graphic (click the Copy button), the graphic comes in very large. You can always resize it; however, that takes a bit of practice so that you don't distort the graphic. 
Changing Colors
  1. Open Paint, and open the downloaded graphic (select File, Open, and locate the downloaded graphic). 
  2. Resize your drawing palette if necessary.
    The drawing area is the bright white space you see when you open Paint. When you open a file, the palette should resize automatically. However, depending on what you've been doing in Paint, the auto resizing might not happen. To resize the palette, look for small circles along the outer edge. Point at any circle and your cursor changes to a double-headed arrow. Click your mouse once to grab the circle and drag your cursor to resize the palette. When the palette is the size you want it to be, release your mouse button.
  3. Pick a color using the color tools you read about in the last post.
  4. Click the bucket tool...you're going to dump a lot of color at once. Your cursor turns into a bucket. 
  5. Click in a pink area of the drawing. All contiguous areas where pink was turns into the new color. 
  6. Resize the graphic to see details. See Part 5 if you need a refresher. 
  7. Replace more colors using the bucket. 
Results


Using the bucket, you should be able to reproduce the changes I've shown in this graphic. 

Erasing and Other Tasks
Since this graphic is simply for practice, we're going to mess it up. Click the eraser tool and just move it over any part of your graphic. The tool does exactly what you'd expect it to do. Press Ctrl + Z to undo the changes. One of the tasks you might do is remove the bottle of ink. 

  1. Use the Eraser to remove the ink bottle. 
  2. Draw the black lines necessary to complete the page edges at the bottom of the page. Adding these lines divides the drawing into areas where you'll dump color later.
    --Pick the color black, and then click the Pencil tool.
    --Draw the lines to complete page edges. 
  3. Draw the pink edge (or whatever color you're working with) to isolate the area below the bottom black line.
    --Click the Eyedropper tool and click in the pink area to sample the color (pick it).
    --Click the Pencil and draw the pink line to complete the lower edge. 
  4. Use the bucket to fill in the empty space.
    --
    Click the Eyedropper tool and click in a color area to sample the color (pick it).
    --Click the bucket and then click in a area where you want to replace the color. 
  5. Save your alter graphic. 
This post should have opened up a host of possibilities for you. Remember that this works best on a piece of clip art because of the contiguous colors. The methods don't work as well on photographs because of the shading that photographs include.

Future Posts
As much fun as playing with colors might be, there's so much more we have to do. So stay tuned for more Paint-related posts. 

GenealogyInTime Enables Pinning to Pinterest

GenealogyInTime is a sleeper online genealogy magazine. Most people find out about it by word of mouth...or email...or blog post. I've read this magazine on and off for about two years now and I've got to say it's usually way ahead of the curve. It's also well written and covers a wide variety of topics. They have the best Google instructions I've ever seen. The magazine is free. All you have to do is subscribe to get a notice in your email that a new issue is available. They also offer an RSS feed and they are on Twitter.

In keeping with their front runner status, GenealogyInTime has come out with a Pinterest policy. They have set up some of the more popular images on their site to allow pinning.

If you've never encountered GenealogyInTime, you perhaps might want to cruise on by their site and see what's up. I've certainly enjoyed my visits.

Thursday, April 12, 2012

Table It!...Part 21...Ribbons or Word "Outs" Properties

Click once to display a larger version of the ribbons, and then press the Esc key to close it.

Word 2007/2010 users have a ribbon rather than a menu. After you click in a table, the ribbon updates to include Table Tools with Design and Layout tabs. They appear only when your cursor is in a table. 

If you display a larger version of the graphic above (or open a Word document and click in a table), you can see the various options that are included on the ribbon. If you've read the posts for the 2003 menu, you should recognize many of the options that appear on these tabs. In addition, you should see that many of the tasks you do in Table Properties are out on the ribbons. The availability of these options on the ribbon means less clicking for you. 

This post is just to introduce the ribbon. In my next post, we'll start going through the options on the ribbon. 

Tuesday, April 10, 2012

Table It!...Part 20...Word 2003 Menu

All we have left to go is the bottom of the Word 2003 menu.
  • Table AutoFormat: Click this option to display the Table AutoFormat dialog. On this dialog, you'll find many pre-formatted tables. Find a table format that you like, select it from the list, and Word add the formatting from the sample table but not the text. You must add the text to complete your table. This option provides a short cut to table formatting. I never use this option because I know how to build my own tables. However, you should click around to see if that situation is true for you too. You might find a table format you love...and you won't have to build it for yourself. In Word 2007/2010, the pre-formatted tables are visible on the ribbon.
  • AutoFit: When you create a table, you select the auto fit option. See Table It!...Part 2 for more information. Having the options on the menu allows you to select the the table and apply a fit option on the fly and after you've already created the table. I find I use this option when I've copied a table from some place else. When I paste the table, it might be too wide for the layout. When that happens, I can select the table, click an auto fit option, and not spend time adjusting the columns manually using the buttons on the ruler.
  • Distribute Rows/Columns Evenly: When you've messed around with a table a lot, you can sometimes wind up with a bit of a mess. If you find you have a few columns that should be about the same size, you can select the columns and click the distribute option on this menu. Word will distribute the columns evenly without you having to adjust them manually using the buttons on the ruler. The same thing holds true for rows. When you work with tables for a while and you get creative, you'll be amazed at how often you'll use these options.
  • Heading Rows Repeat: This option is useful for pages that run on more than one page. Select a row in a table and apply this menu option to cause the selected row to appear at the top of the table on subsequent pages. You've seen this option before when working with row formatting. The availability of this item on the menu simply makes it easier to apply on the fly rather than selecting the row, displaying the table properties, and add a check mark to the box on the Row tab. You also seen other options--Split Table.
  • Convert (Text to Table/Table to Text): This option allows you to do what it says: convert. If you have text in a table and change your mind, you can select the table and convert the table to text...remove table formatting. If you have text that you'd like to put into a table, you can select the text, select the Text to Table option, and Word applies table formatting. In either case you need to do some clean up; however, by now you should be pretty well versed in tables to handle it.
  • Convert-related dialogs: You should recognize most of the options on these dialogs. Items of interest: 1) Separate text with/at: You can enter a space when converting table to text. 2) Nested tables refers to a table within a table. I can't see where you would do that but post a query if you have the need and I'll write about it.
  • Sort: This option is one handy little item. Highlight a table and it lets you sort entries in the table. The dialog you see below is for a table. The most I've ever had to change was to tell it what column to sort by and whether I wanted ascending or descending order. Now here's a little secret. Highlight text that isn't in a table and it lets you sort text by paragraph...remember those hidden codes? It counts a paragraph as everything between the paragraph marks. I use this option to alphabetize lists that I don't want to put into tables.
  •  Formulas: I don't use them and I can't think of reason you would. However, if you think of something and can't hack your way through using the Help, post a comment. I'll see what I can do with it.
  • Show Gridlines: When you alter the borders of a table, one of the options you have is to remove a border. You might have any number of reasons for doing so. When you're working, it's sometimes helpful to see where the borders would be if you had them displaying. Select the table and click this option to turn on the gridlines without affecting the borders. In other words, you just get to see where the borders would be if you had them.
Next Post
We tackle the ribbons that Word 2007/2010 users see. You'll be doing lots of the tasks we've discussed for the Word 2003 menu. The difference is location of the option.

Saturday, April 7, 2012

Much Ado About Graphic Software...Part 6


When you use clip art, you are able to change the colors to match or contrast with other colors in your document. To change colors you need to know about the tools you can use and how to use the Paint color pallet.   

Tools
Here are the tools, you'll use.
You've already used the text tool and the magnifying glass. That leaves the following tools:
  • Eye Dropper--Use it to sample an existing color. When you click the eye dropper, you can then click a color in the drawing to change the default color to the color you picked. After you have a color you want, you can use the bucket or pencil to change colors to the selected color.
  • Bucket--Use it to replace one color with the selected color in a large contiguous area of the graphic. 
  • Pencil--Use it to replace one pixel with the selected color; that is, detail replacement. 
  • Eraser--Use it to remove anything from the graphic that you don't want. 

Colors--New Version of Paint
This dialog should look familiar. It's the standard Microsoft color dialog that you've seen in other posts.
  1. You need to pick a color for Color 1. You can:
    --Pick a color in the default color strip beside the Edit Colors button.
    --OR--
    --Click the Edit colors button to display  the Edit Colors dialog. 
  2. You can:
    --Pick a color in the Basic colors area.
    --OR--
    --Define a custom color using the pallet on the right. 
Defining a Custom Color
  1. To define a custom color, click in the pallet near the color you want.
  2. Use the slider to the right to fine tune the color. The color definition appears in the fields below (Hue, Sat (saturation), Lum (luminosity)) and (Red, Green, Blue). 
  3. Write down the color definition if you think you'll want the color at a later date. You can enter the numbers into any color pallet and reproduce the same color.
  4. Click the Add to Custom Colors button to add the color to the Custom colors list to the left. 
  5. Click OK. The dialog closes and the custom color is added to the color strip beside the Edit Colors button. 
Tools and Colors--Older Version of Paint
The same tools I describe above are available on the sidebar menu. The default colors display at the bottom. 

Selecting Another Color
  1. Click Colors on the main menu, and then select Edit Colors. The Edit Colors dialog appears.
  2. You can:
    --Select a Basic colors.
    --OR--
    --Click Define Custom Colors to display the Edit Colors dialog. This is the same dialog that appears above. Please scroll back to the instructions Defining a Custom Color
More Information on Colors
If you would like more information on colors, see this website: www.wilsonmar.com/1colors.htm

Next Post
After reading this post, I'm sure you can guess what's is going to happen when we actually change the colors in the graphic. However, I'll save the actual instructions until the next post. 

Wednesday, April 4, 2012

Table It!...Part 19...Word 2003 Menu


The Word 2003 menu includes a few items we haven't addressed and we'll go over the first half in this post and the remainder of the options in the next post. You'll find out why when you get to the Split Table option.

Draw Table--We've talked about this option. If you like maximum control, click Draw Table. A drawing pencil appears in your doc and you can draw individual cells. After you have drawn cells, click in your document to get rid of the pencil and get your cursor back. I'm usually not driven enough to use this method.

Insert/Delete/Select--I'm assuming you can use these options to insert, delete, and select to deal with all or part of tables.

Merge Cells/Split Cells...--We've used these option. Highlight two or more cells to merge them. Or, highlight merged cells and click the Split Cells... option to restore the cells.

Split Table--This option allows you to split a table at any logical place. Using this option has design implications. You have to decide if you're happy to have a table just run from page to page without regard for clunking information for presentation. Consider this table.


You can handle the layout in one of two ways.

  • Let the table run from page to page. You should highlight the heading row and apply the Heading Rows Repeat option to have the heading appear at the top of each page. You should also disable the Allow row to break across pages option so that you don't have part of a cell at the bottom of a page and the remainder at the top of the next page. This layout is used for tables that go on for page after page. See Table It!...Part 13...Row Formatting for a review.
  • Split the table to chunk information for presentation purposes. If you look at the table above, you can see that the gray row near the bottom of page 1 is the visual break for the next McKee family in the census. Since the first family takes up most of the first page, you could use the Split Table option to split the table and place the next McKee family (and perhaps additional families) on page two. 
Split a Table
  1. Confirm that the heading row does not have Heading Rows Repeat applied.
  2. Select the heading row and copy it. Point your cursor at the heading row just outside the left side of the table. Word changes your cursor from an I beam to an arrow. Click once and Word highlights the heading row. Copy the heading row (Ctrl + C). 
  3. Click your cursor before the first character where you want to insert the break. In the case of the example above, you would click in front of Illinois.
  4. Paste the heading row (Ctrl + V).
  5. Split the table. In the example, click your cursor before Dwelling in the heading row you just added, and then click Table on the main menu to open the Table menu and select Split Table. Word inserts an empty line. 
  6. Add a page break to move the newly split second half of the table to the next page. To do so, click in Dwelling once. On the main menu, select Format and then Paragraph. The Paragraph dialog appears. Select the Line and Page Breaks tab, click the option Page break before, and then click OK. You use this method to eliminate spacing problems. 
I'm pretty sure you're scratching your head by now. You need to create a few tables and experiment with using the Split Table option to understand how it works. I'll do the remainder of the menu in the next post.

For Word 2007/2010 users, you have all of these same capabilities. They've just been moved from a drop-down menu to the ribbon. So, if you've read this post, you'll see similar instructions again when I begin talking about options on the ribbon. 

Tuesday, April 3, 2012

Suspect Web Pages

It happens to everyone. You arrive at a web page and you're just not sure if the page is safe. You hope your virus protection is really working but you just don't know. One thing you can do is have Norton (a leading provider of security software) check the web page for you.

To check a web page:

  1. Assuming you have the web page open, copy the web page address (highlight the address and press Ctrl + C). 
  2. Click the new tab in your browser. After you click the tab, a new (empty) web page opens.

  3. In the address bar, type: http://safeweb.norton.com. The Norton page appears.

  4. Paste the web page address you want to check (press Ctrl + V) in the field is this site safe?, and then press Enter. Norton scans the web page and displays a report. 
  5. Be sure to scroll to the bottom to see the entire report. 
Note: If you know the address of the web page you want to have Norton scan, you can type the address directly into the field is this site safe? and press Enter.

No scan is ever fool proof. No virus protection is 100%. However, this free scan should give you some protection when you encounter a web page that makes you nervous.

Photoshop Beta Download and Video Preview

For those of you who follow my posts about graphics, you know that I don't normally recommend that hobby genealogists purchase some of the more expensive pieces of software that are available and promoted. However, I'm sure that many of you are curious as to what some of this software can do and what it looks like.

Photoshop in particular is pricy and it has a steep learning curve. Professional photographers and graphic artists use it. The latest version is in beta (limited release) but Adobe is offering everybody a peek. And, they are including videos that show you how to do some of the new stuff included in this release of Photoshop.
  1. Click this link to go to the Adobe Labs site.
  2. Scroll to the bottom of the page to Getting Started.
  3. Look for the links that will let you download a beta copy and view video(s).
In addition, Lynda (software training website) is offering free videos too. I'm not sure if they're the same videos or Lynda's own videos (a mixture I suspect). I didn't stop to look at them. Click this link to go to the Lynda website page with the training.

b.t.w. Lynda offers lots of training for reasonable sums. The site used to offer unlimited training for a year at a flat fee. So you might want to click around to see if there's something you're interested in pursuing.

Anyway, I'm not a fan of Photoshop; however, it is considered the premier piece of software for photographs. Professionals frequently use it for photo restoration. If you decide to take a peek, I hope you have fun!

Monday, April 2, 2012

Table It!...Part 18...AutoFit


Again...When your cursor is in a table and you right-click, the pop-up menu that appears includes table related options. The last two options in the group we've been looking at are Borders and Shading... and AutoFit.

Borders and Shading...
If you click this option, you see a familiar dialog...one that we've spent lots of time on. See these posts:
Table It!...Part 10...Borders Tab
Table It!...Part 11...Affecting Cells

AutoFit

  • Select AutoFit to contents if you want the width of a column governed by its contents. For example, a column with three characters in it will be narrower than a column with ten characters.
  • Select AutoFit to window if you want a table that has equal columns spaced across the width of the page. In addition, you can make adjustments on the fly. 
  • Select Fixed column width if you want the table to resize itself in relation to the margins; that is, the entire width of the page. You can set the width using the up and down arrows to create a table that isn't as wide; that is, it doesn't go margin to margin. In addition, you can make adjustments on the fly

You've seen these options before in Table It!...Part 2. See that post for more details.

Upcoming Posts
If you're a Word 2003 user, we have a few more options to look at on the Table menu.


If you're a Word 2007/2010, you have options we need to look at on two tabs: Design and Layout.

I'll finish up the Word 2003 options, and then we'll tackle the Design and Layout tabs.