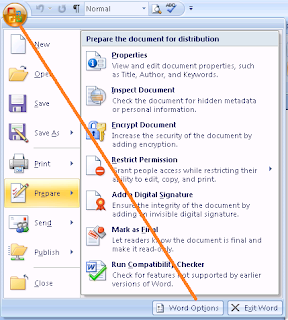
Adding buttons to the toolbar is a two-step process. First, you must display the Word Options, and then select Quick Access Toolbar. Second, you must move buttons from an available list to a selected list, and then click OK.
Display the Quick Access Toolbar Dialog
 In Word 2007, click the Office Button, and then Word Options. The Word Options dialog appears.
 In Word 2010, click File, and then Options. The Word Options dialog appears.
Select Quick Access Toolbar. The customize dialog appears.

Move Buttons
In the available list on the left, locate and click the button you want to add to the toolbar. Click the Add button between the lists. Word moves the button to the selected list on the right. When you have all of the buttons you want in the selected list, click OK. The dialog closes and the buttons appear above the ribbon.
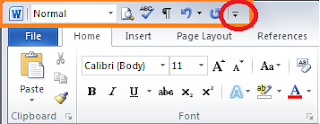
 In the future, click the button circled in red, and then select More Commands from the drop-down list. The customize dialog appears. Use the dialog to add or remove buttons on the fly.
No comments:
Post a Comment